Benchmark is the demo of the running of PC programs or various activities to evaluate an article’s relative exhibition. Benchmarking is taking a screenshot of your personal computer’s presentation. It lets the users innovate the hardware through software and helps to assess the issues of troubleshooting and hardware performance. Benchmarking is a technique one must carry out carefully as it’s a complex procedure.
7 CPU Benchmark Tools to download in 2024 – PCMark, User Benchmark, Fraps, MSI Kombustor, CineBench, NovaBench, and Speccy.
To help you with the tools and procedure, we have compiled some of the Best CPU Benchmark Software in this article.
Table of Contents
Top 7 Best CPU Benchmark Software
The following list of software includes some of the Best CPU Benchmark Software that will help you to get free benchmark tests and enhance the performance aspects of your device effectively and very efficiently.
PCMark
It is a tool that lets users compatibly benchmark their mobiles and PC in a single app. With its latest version, this software has a rapid interface that can easily be understood and used. PCMark 10 is the latest version of 3D Mark and features a comprehensive set of tests. It has various better features which can help you optimize your device performance.
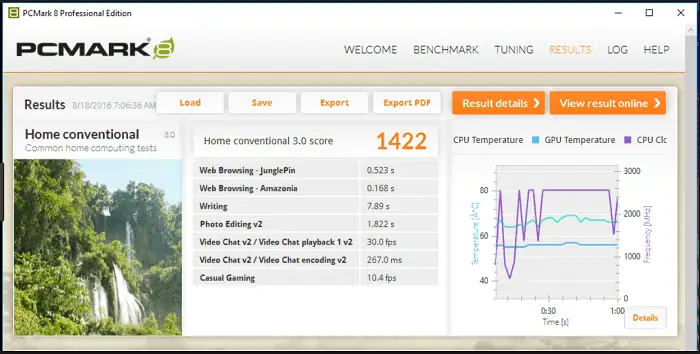
PCMark 10 automatically scans the hardware and recommends the best benchmark of the system. This software is rapid and efficient as well. It possesses the ability to update benchmark tests individually. Its custom settings provide the resolution and better quality.
The advanced edition, in addition to the same features as the basic edition, includes features such as saving results offline, comparing results side by side, and custom benchmark settings.
Also see: 10+1 Best PC Cleaner Software to Boost Your System
UserBenchmark
This works without the installation and therefore is the lightweight alternative for GPU benchmark software for PC. This tests SSD, HDD, RAM, CPU, USB, and GPU. It provides access to scores for gaming, desktop, and workstation performance.

This pc benchmark software also provides an overall percentile score and component-specific percentile score as well. It speed tests the PC in less than a minute. It shows random graphics even though this software tests the PC’s performance.
Also see: Top 6 Best Streaming Video Recorder Software to Download
Fraps
This benchmarking tool is a well-known PC utility that is the best benchmark software choice if one wants GPU benchmarking software. This benchmark software doesn’t have the CPU speed test or GPU stress test, while others do.
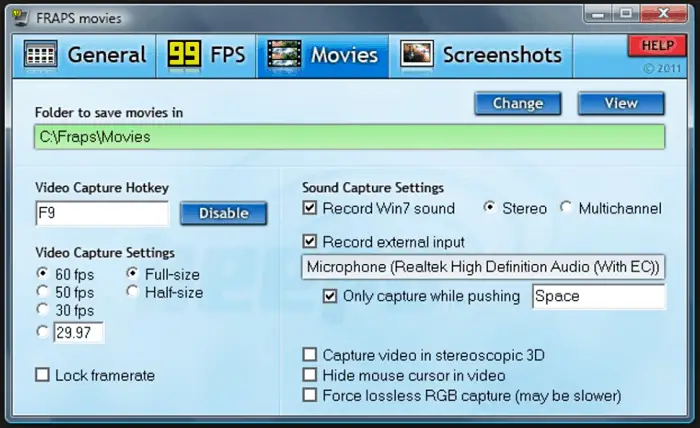
This a very light and easily usable benchmarking program. There is no report of any crash experience while playing games and using this benchmarking program as it doesn’t consume system resources. This software is the best choice and gives vital statistics to those who prefer playing games on their computer.
Also see: 11 Best PC Optimizer Software for Windows
MSI Kombustor
This is another fantastic free program of benchmarking that can quickly test the CPU and GPU performance. The risk of system failure sometimes increases when the users benchmark their PC without having the information about it, but there is no point in worrying about using Msi Kombustor. When the user practices overloading the PC, it itself controls and handles it.
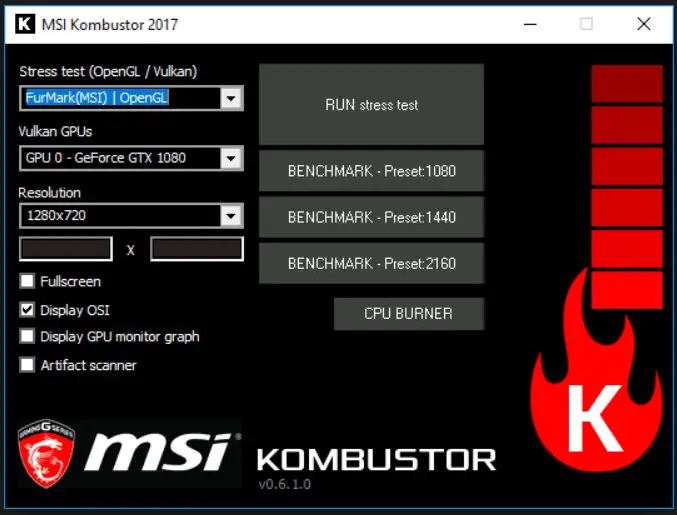
This tool consists of a straightforward and uncomplicated interface. This tool is very flexible in CPU and GPU benchmark tests. You can perform the CPU stress test in three 3D modules by the wavy plane (GL2) trials, a triangle of death, or a Fractal Frame.
CineBench
This laptop benchmark is the Best CPU Benchmark Software for Mac OS and Windows, providing the most accurate CPU information. It also provides information about a computer’s performance abilities. It is based on Maxon’s cinema 4D, and this creates 3D content in studios and production houses.
CineBench can measure up to 256 processor threads and specifically tests all available processor cores of the CPU. In contrast, other benchmarks will test a combination of the CPU and GPU or overall PC performance.
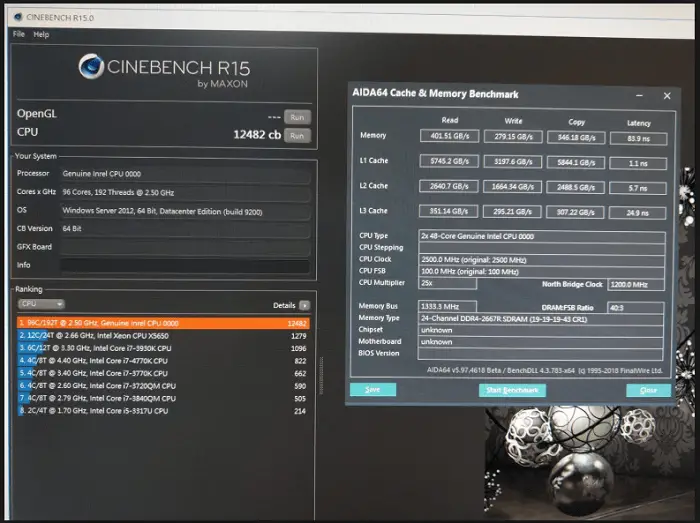
The processor is graded in points after the completion of the CineBench test. The higher the points, the stronger the output of CPU performance. It can assess up to 16 CPUs or CPU cores.
NovaBench
Mac and Windows OS have the availability of NovaBench. It is a free benchmarking tool that is used to assess the ability of processing and graphic of the computer. It can benchmark the specific areas of the computer, like running the test on GPU, CPU, Hard disk, and memory.
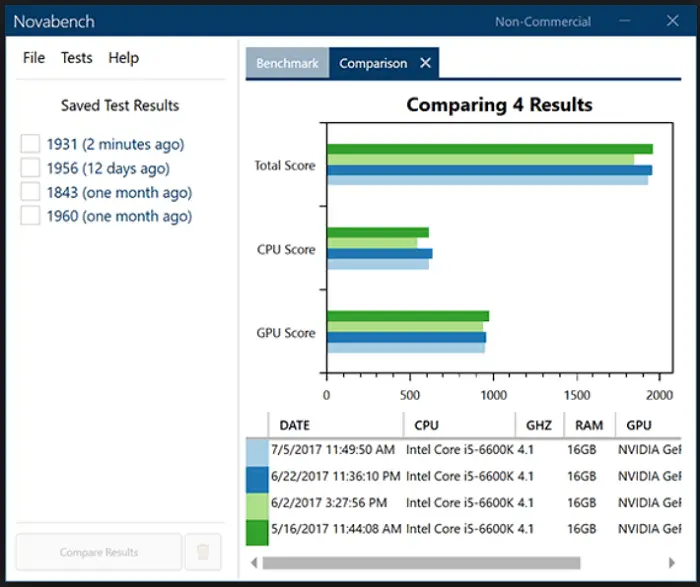
NovaBench is very easy to run. But if you fail to submit the results online, they are meaningless. To submit the results online, registering an account has to be done, and other users can then compare these results to get a brief overview of the system.
Undoubtedly, better and more comprehensive benchmarking is there, but NovaBench is cost-free for non-commercial and personal use, whereas others cost money.
Speccy
Piriform developed it and is counted among the Best CPU Benchmark Software. It runs under Windows 7, windows 8, windows 10, vista and XP for 32 and ×64 versions of these operating systems. Speccy renders all the information about the PC specifications by its name. It provides a rundown of every component.
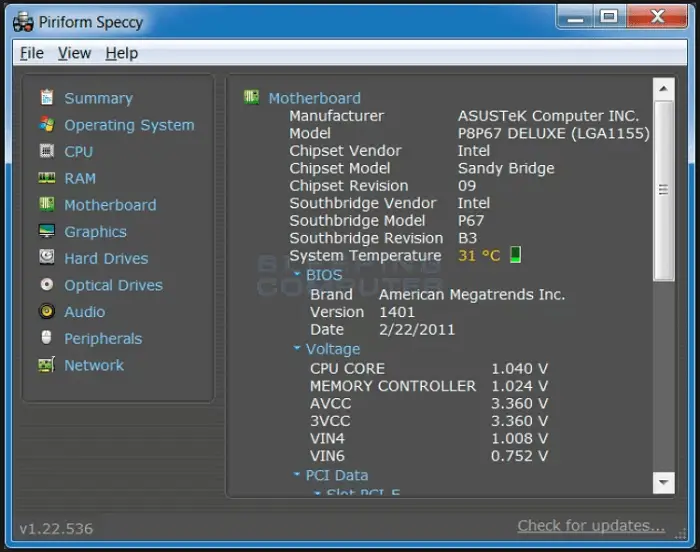
To avoid issues on the computer, the real-time temperature of critical parts can be seen. It details the graphics card, RAM, CPU, motherboard, and more information. Therefore, You can save the scan results as an XML, snapshot, or text file.
FAQ’s
Which benchmark is best for a processor?
You can try UserBenchmark for your processor, which is the most popular. Other recommended benchmarks are UserBenchmark, Geekbench, CPU Benchmark, Cinebench, PassMark, Blender, and PCMark 10.
How do you benchmark a CPU?
For benchmarking a CPU, follow these steps: Press Windows Key + R> type PERFMON> performance monitoring test will run, providing you the CPU benchmark.
How accurate is the CPU benchmark?
CPU benchmarks provide a general performance idea but may not accurately reflect real-world usage. They focus on specific tasks and may not consider all variables. Combine benchmark results with actual usage scenarios and user reviews for practical insights.
What is the fastest CPU today?
The AMD Ryzen 9 5950X and Intel Core i9-11900K were among the fastest consumer CPUs. However, the CPU landscape can change rapidly, so checking the latest reviews and benchmarks for the most current information is recommended.
Conclusion
In conclusion, The article is a perfect compilation of some of the Best CPU Benchmark Software which will help you to get better software and hardware performance from your device. So, look at each of them and choose the most suitable one for yourself.
Dedicated group of Computer Engineers making tech updates accessible to all. Our dream is to simplify and share tech news with everyone.