Google Drive is now the most widely used cloud storage service. Google Drive is a data storage application used for making a backup or syncing data of your files and folders. We may use Google Drive to edit docs online, back up our files, and save data in the cloud for convenient access from anywhere. We will talk about how to add google drive to file explorer.
To add google drive to file explorer windows 10, follow these quick steps:
- Download and install the Google Drive sync client for Windows.
- Sign in and configure sync settings.
- Open File Explorer to access the “Google Drive” folder under “Quick Access” or “This PC.”
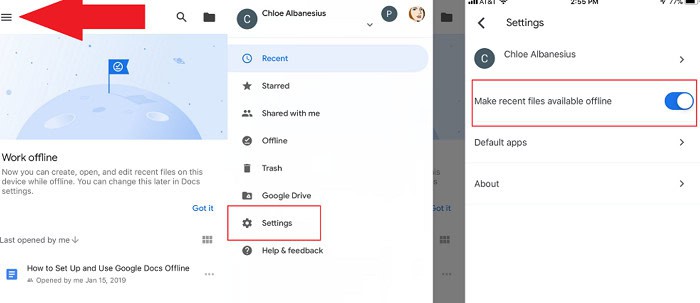
Normally, when we have to use google drive, we need to have our internet browser open. What if we tell you that now you can add Google Drive to File Explorer on your Windows and use it offline?
Let’s check out how :
Table of Contents
Steps To Add Google Drive To File Explorer
You can now enjoy the benefits of using your google drive without the use of your internet in just a few steps:
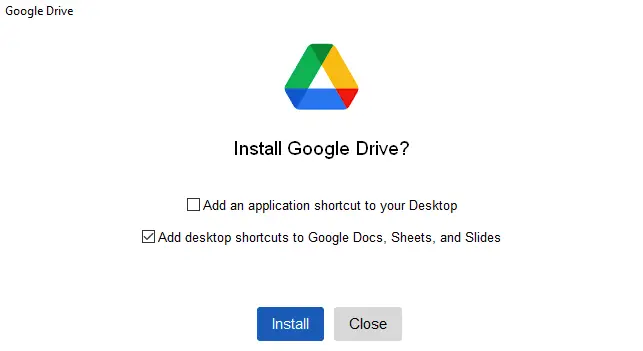
STEP 1: Download Google Drive Backup And Sync Application
If the google drive application is pre-installed on your Windows, you can skip this step.
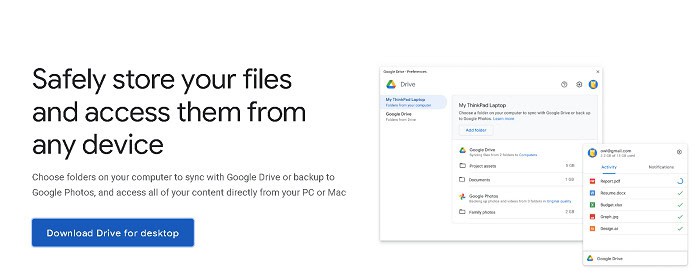
You can download google drive backup and sync on our pc through its official website. Or you can tap on this like below.
Visit: Google Drive
Click on the download button next to learn more. Then you must choose the location where the application will appear. For example, you can save your google drive file on your desktop. A file named installbackupandsync.exe will appear on the desktop. Then it would be best to double-click on that setup to start the installation process.
STEP 2: Signing Into Your Google Account
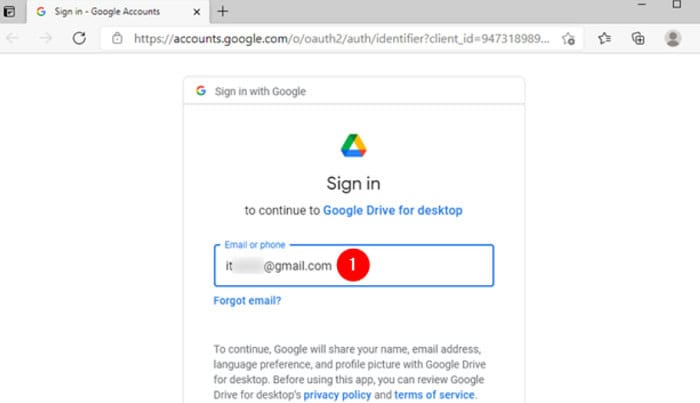
After installing the app, a window named ‘SIGN IN TO GOOGLE DRIVE’ will appear. In that window, we have to right-click on the sign-in option. The primary browser on your computer will launch, leading you to the Google website. Google will then ask if you want to give your newly installed app access to your Drive files. By choosing “Sign In,” you may allow access.
When you’re done after putting in the credentials, google will show a success page on the screen. Then we will close the window as its work there is done.
Open the File Explorer program. A standard drive will be present by the name of GOOGLE DRIVE under “Devices and drives,” it will also appear in the Quick access area of the navigation panel.
STEP 3: Select The Data For Sync In Google Drive
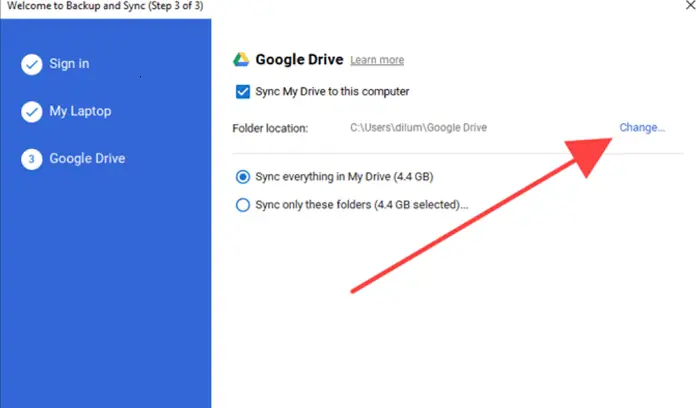
The next step will be syncing the app to the PC. After doing this, we will see Google Drive in the Quick Access menu. You’ll be able to view the data on the drive even when you’re not using the internet.
We must also upload the PC’s data to the Google Drive folder. There are options for doing so:
- Sync my drive with this Computer: This option allows you to access all of your drive’s data from your computer.
- Sync everything in My Drive: This option allows you to sync your drive’s folders and files with your computer.
- Only sync certain folders: This option allows you to sync only the chosen folders.
STEP 4: By Editing Registry Files
Add google drive with this method by following these steps:
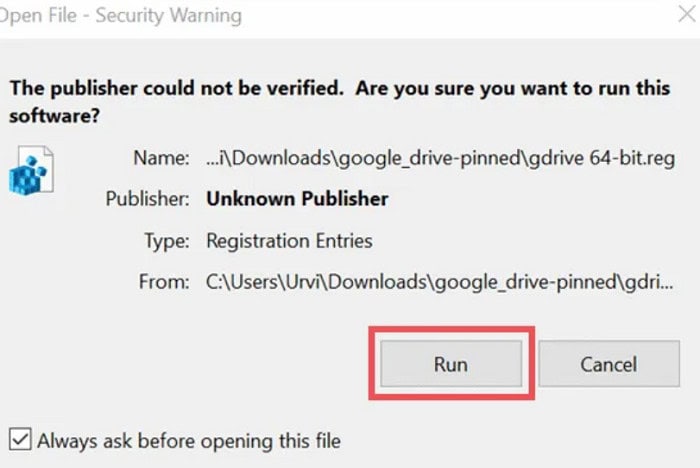
- We have to download the necessary registry file. If a 32-bit operating system is being used, click GDrive 32-bit. Click GDrive 64-bit if you’re using a 64-bit operating system. Now press the Run button.
- When the warning box displays, choose Yes. The warning box appears because, as previously stated, registry file changes impact the system’s operation.
- Check your File Explorer to ensure Google Drive linking has taken place to the Navigation bar separately from the Quick Access section following this step. If you want to remove Google Drive from the navigation pane for whatever reason, double-click the drive-undo registry file and then select Run.
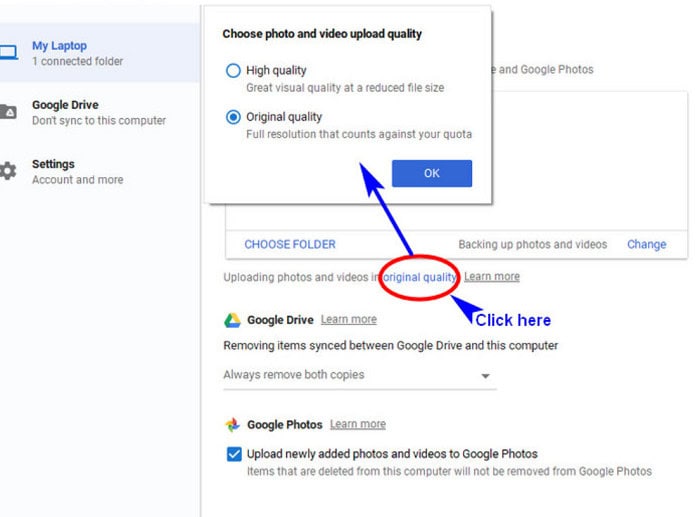
To sync your films and photographs, go to Preferences and follow the above steps.
Click Original Quality if you want to adjust the quality of the photographs you upload. A new window appears, allowing you to adjust the image quality. The original quality choice consumes space, but the High-quality option compresses your photographs without sacrificing quality.
The original quality choice might soon deplete your hard drive’s limited storage capacity. You may select the high-quality option, which provides you with free limitless photo storage. Then, when you upload the image or video, you have to choose the option Upload, which will upload the photos and videos to Google Photos.
USB Devices and SD Cards options are also present at the bottom of the window. You may use this to back up photographs from your camera or a USB drive linked to your computer.
Download: Registry File
To remove/delete the images, we have 3 options available
- The first step will be removing everything completely from the pc, including the hard drive.
- The second option will be not to delete anything from pc.
- The safest choice is to ask before destroying both copies, which is the last and default option. You may, however, modify the default to any choice from the list you like.
See Also: 8 Ways You Can Fix Windows 10 File Explorer Won’t Open
STEP 5: Give Offline Access To Files In Google Drive
Open Google Drive in File Explorer and select ‘Shared Drives‘ to offer offline access to your files. Then check the box next to the item, right-click it, navigate to Offline Access, and pick ‘Available Offline’ from the pop-up menu.
Configure the Sync Settings for Google Drive
Google Drive has two sync methods to assist you in transferring your Drive files to your PC, each with its capabilities.
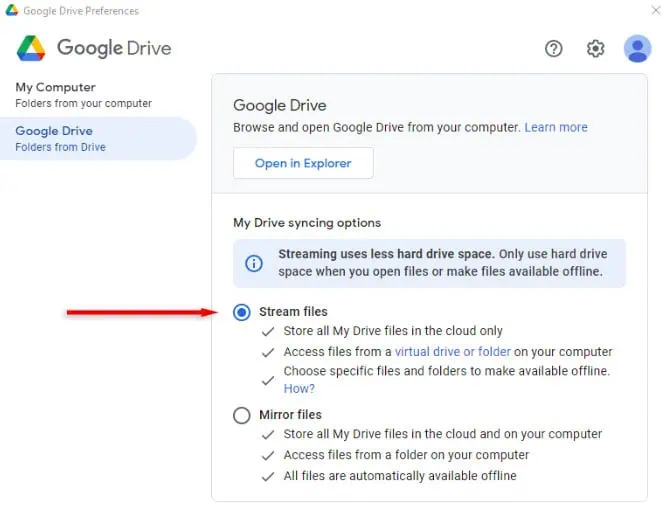
The first technique, dubbed “Stream,” enables manual file downloads from the cloud to your PC. You should enable this approach if you don’t want your Drive files to take up all of your PC’s storage space.
The second approach is “Mirror,” which keeps your Drive files on your PC and your online storage. Since all your cloud files are downloaded, your PC’s storage will quickly become full.
Configure the sync method in the Google Drive app once you’ve made your decision. To begin,
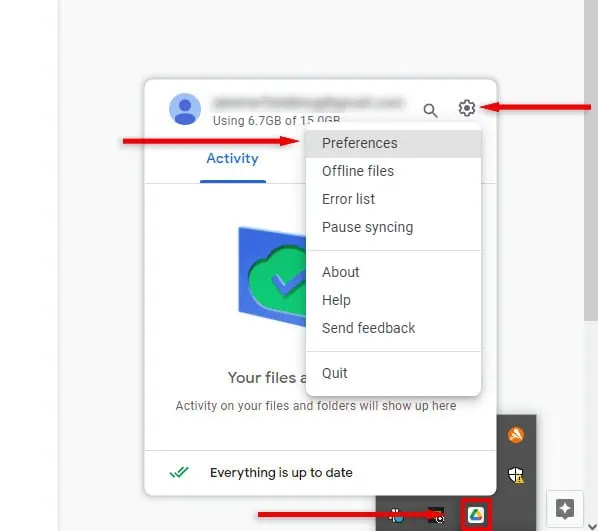
- Click the Google Drive software icon in the system tray.
- A Drive pane will appear. Select “Preferences” under “Settings” in the top-right corner of this page.
- Click “Google Drive” in the left sidebar of the newly opened window. Depending on the method you’ve chosen, enable “Stream Files” or “Mirror Files” in the right pane.
After that, your cloud files will be properly synced via Google Drive. Enjoy!
Removing Files From Google Drive In File Explorer
Files deleted from File Explorer by default are not deleted from Google Drive. This is achievable by Google Drive to avoid any unintentional file deletion. On the other hand, you may quickly enable this option via the Backup and Sync app if you’d prefer. How? Read on.
- From the system tray, click the Backup and Sync buttons. Then pick Preferences from the list by clicking on the three-dot menu symbol.
2. Next, navigate to the My Laptop section on your left and choose the “Always erase both copies” option from the drop-down box under Google Drive. Next, click OK.
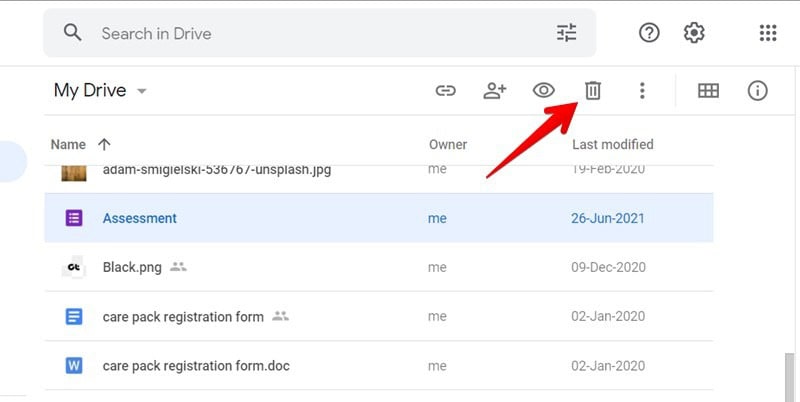
When you delete something from your Google Drive folder, its online counterpart also goes into the trash.
Note: After 30 days, Google Drive trash files are automatically erased. Only 30 days are available for you to recover deleted files.
Moreover, by deleting unused files and directories, you will be able to manage Google Drive storage directly from Windows File Explorer.
Removing The Google Drive Folder From Quick Access
Right-click the Google Drive folder and choose “Unpin from Quick Access” from the list if you no longer want to keep it in File Explorer.
Moreover, all the files and folders that have already been synchronized with your PC will remain intact even if you unlink your account or remove the Backup and Sync software from Windows.
FAQs
How to make google drive your local drive?
Select the Properties option from the context menu in the Documents folder by right-clicking it. Then we have to choose the option 'Include a folder' on the drop-down menu and navigate to the Google Drive folder. Then we have to choose google drive as the location in order to make it your default saving location. To continue, click OK or Apply.
On my PC, where is the Google Drive folder?
Go to drive.google.com on your PC. You'll notice 'My Drive', which includes Google Docs, Sheets, Slides, and Forms you've made.
How can I include Google Drive in quick access?
Why has my Drive suddenly disappeared?
Accidental formatting or deletion may occur on the local disc. The hard drive might not work with Windows. In the BIOS, your disc might be disabled. Bad sector problems can also bring on local disc issues.
Conclusion
With the help of the steps mentioned above, you can add google drive to your file explorer in a hassle-free manner in just a few minutes.
Now you can have access to your google drive even when you don’t have an internet connection. If you guys are aware of any other way to add Google Filee to File Explorer, do let us know.
See Also: 13+1 Best Registry Cleaner Software For Windows (Free & Paid)
