How to Record Kodi Video: Easy-to-Follow Steps
Kodi is an easy-to-use, free-to-use media player software that lets you control and play all kinds of media. Recording videos allows you to curate your collection of media. So, it is essential to learn how to record Kodi video.
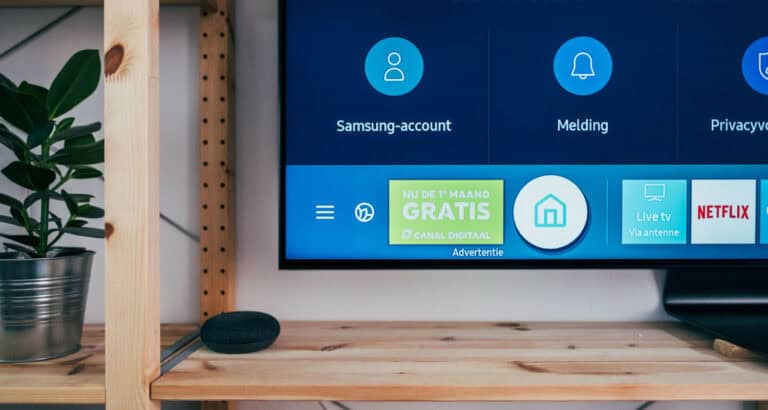
First, you must open Kodi and then access the live TV section. Then, find the channel that you want to record in. Next, hit the “R” button on your keyboard or see the “Kodi Record Button” on your keyboard. In this way, recording starts in Kodi.
Recording videos within Kodi extends its usefulness by enabling you to capture, archive, and enjoy content on your terms. Let’s now understand and learn how to record Kodi video. You might want to check this article on Installing Kodi Fusion.
What is Kodi?
Kodi is an open-source media center software application designed for organizing, managing, and playing various types of digital media. It gives you a smooth way to get your multimedia content up and running.
Brief History and Development:
Kodi is a free software application for a media center designed to play, organize, and manage digital media.

It gives an easy-to-use connection point to clients to get to their sight and sound substance.
Core Functionalities:
The following are the core functionalities of Kodi-

- It provides smooth and high-quality playback of multimedia content.
- It can automatically retrieve metadata, such as movie posters, episode descriptions, and album covers, making your library visually appealing.
- They allow users to customize their Kodi experience according to their preferences.
Platforms It Supports:
It very well may be introduced in the accompanying stages:

- Kodi runs on different adaptations of the Windows working framework, including Windows 7, 8, and 10.
- macOS
- It is a famous decision for media-focused applications on Linux-based frameworks.
- Android: Android smartphones, tablets, and TV boxes are all supported by Kodi.
- For iOS clients, there are ways of introducing Kodi on jailbroken gadgets.
- Kodi is a well-known decision for transforming a Raspberry Pi into a devoted media place.
- Other Systems: Kodi can run on different stages, like FreeBSD and Apple television.
Why Record Videos on Kodi?
Recording videos on Kodi offers several compelling benefits:
- Convenience:


Recording videos allows you to time-shift your TV-watching experience. This is especially valuable in regions with poor or no web availability.
- Flexibility:


Some streaming platforms have limitations on offline downloads or content availability. Recording your favorite shows or movies ensures you have access to them without worrying about such restrictions.
- Archiving Favorite Shows and Movies:


Recording recordings on Kodi permits you to chronicle and protect your #1 shows and films as long as possible. This guarantees that you generally approach the substance that makes the most significant difference.
Prerequisites for Recording on Kodi
An overview of what you need is as follows:
Hardware Requirements:
- TV Tuner or Capture Device: These devices allow Kodi to receive and record TV broadcasts from cable, satellite, or over-the-air sources.
- Adequate Storage
- Decent Processor and RAM: A reasonably powerful CPU and sufficient RAM to handle recording tasks smoothly.
Software Requirements:
- Kodi: Ensure you’re utilizing a moderately late rendition.
- Television Tuner or Catch Gadget Drivers: Install the necessary drivers for your capture or TV tuner.
- PVR Add-On: Kodi uses PVR add-ons to manage and schedule recordings.
- Electronic Program Guide (EPG) Data: Ensure you can access EPG data, as it’s essential for scheduling and recording TV programs.
Network Setup:
- Local Network: Assuming you want to utilize Kodi’s implicit UPnP ( Universal Plug and Play) server to get to accounts on different gadgets inside your neighborhood organization, guarantee that your devices are associated with a similar organization.

- Internet Connection
- Network Sharing (if using NAS): If you save recordings on a NAS device, set up network sharing.

Setting Up Kodi for Recording
Here is a bit-by-bit manual to assist you with how to record Kodi streams:
- Installing Kodi:
1.1 Visit the Kodi site (https://kodi.tv/endlessly) and download the Kodi installer.
1.2 Run the installer and adhere to the on-screen directions to introduce Kodi on your PC or gadget.
1.3 Once installed, launch Kodi.
2. Configuring Settings:
2.1 interestingly, you’ll be provoked to pick your language and district after sending off Kodi. Select your preferences to proceed.
2.2 Go to “Settings”> “Media” to design the sources.
2.3 If you want to download EPG data and add PVR add-ons, ensure your device is connected to the internet.
3. Enabling PVR (Personal Video Recorder):
3.1 Install PVR Add-On:
How to set up a PVR add-on is as follows:
- From the Kodi home screen, go to “Additional items.”
- Click on “My additional items” or “Extra program,” contingent upon your Kodi adaptation.

- Choose “PVR IPTV Simple Client” or “PVR clients” (the name may change depending on the add-on).

- Click “Install” to add the PVR add-on to Kodi.


3.2 Configure PVR Add-On: The configuration process varies depending on your chosen PVR add-on. Generally, you’ll need to provide details about your hardware, EPG data source, and channel setup.
3.3 Enable the PVR Add-On: Once configured, go to “Settings”> “PVR & Live TV” or a similar menu option. Enable the PVR add-on you’ve just configured.
See also: How To Install And Run Kodi On Xbox One
Using NextPVR as a PVR Client
Why NextPVR:
Here’s why you might choose NextPVR
- Compatibility: NextPVR supports various TV tuner cards and captures devices.
- Stability
- Community Support: There’s an active NextPVR community that can provide assistance and guidance.
Installation and Setup:
Here’s how to set up NextPVR with Kodi to learn how to record Kodi video:
- Download the most recent version by visiting the NextPVR website at https://nextpvr.com/.
- Get the installer up and running and follow the instructions on the screen.
- After installation, launch NextPVR. You must configure it to work with your TV tuner and capture device.
Configuring NextPVR with Kodi:
The steps on how to record TV shows on kodi are as follows:
- Introduce Kodi (possibly not currently introduced) and launch it.
- Install the NextPVR PVR Add-On:


2.1 From the Kodi home screen, go to “Additional items.”
2.2 Click on “My additional items” or “Extra program,” contingent upon your Kodi adaptation.
2.3 Select “PVR clients” or “PVR IPTV Simple Client”.
2.4 Click “Install” to add the NextPVR PVR add-on to Kodi.
3. Configure the NextPVR PVR Add-On:
3.1 Navigate to “Settings”> “Add-ons”> “My add-ons” following installation.
3.2 Select “PVR clients” or “PVR IPTV Simple Client”.Click “Configure.”
3.3 Choose “NextPVR Client” as the client to enable. Configure the NextPVR client settings, including the IP address of your NextPVR server and port number.
4. Enable and Use NextPVR in Kodi:
4.1 Return to the Kodi home screen. Navigate to “Settings”> “PVR & Live TV” or a similar menu option.
4.2 Enable the NextPVR PVR add-on. Access the TV section within Kodi to view live TV, schedule recordings, and manage your TV channels.
See also: Install Genesis Reborn Kodi Add-On
How to Record Live TV on Kodi
Steps to record:
Here’s how to record a Kodi video:
- Launch Kodi on your device.
- Find the Live TV section in the main menu or the PVR & Live TV section in the settings menu. Navigate to the Live TV section.
- Tune in to the Desired Channel:
3.1 Utilize your controller or console to peruse the accessible diverts in your television guide.
3.2 Choose the channel from which you want to record. This should open the live TV stream.
4. Start Recording:
4.1 While watching the live television stream, press the “R” key on your console or utilize the assigned button on your controller.
4.2 Alternatively, you can right-tap on the live television stream and select “Record” from the settings menu.
Scheduling Recordings:
Here’s how to schedule recording-
- Navigate to the TV guide in Kodi’s Live TV or PVR & Live TV section.

- Select the Program to Record:
- In the program details, look for an option to schedule a recording. This might be labeled as “Record” or “Schedule.”
- Choose the recording options for start, end, and recording frequency. Confirm the recording schedule.
- Kodi will keep track of your scheduled recordings in the PVR & Live TV section.

Managing Recorded Content:
Here’s how you can manage your recorded content-
- In Kodi’s PVR & Live TV section, you’ll find an option for “Recordings” or “Recorded TV.” Navigate to this section to access your recorded content.

- Browse your rundown of recorded shows and films and select the one you must watch.
- Using Kodi’s context menu options, you can typically perform actions on your recorded content, such as deleting, renaming, or moving it to a different location.

Tips for Effective Recording
These are the tips you should follow when you learn how to record with Kodi:
- Here are some tips for more efficient and enjoyable recording experiences:
- Kodi’s time-shifting feature allows you to pause, rewind, and fast forward live TV, even while recording.
- If your PVR add-on and EPG data support it, enable channel artwork.
- Padding is extra time added to the beginning and end of a recording to ensure you get all the content due to variations in program schedules.
- Find the option to set recording padding in your PVR add-on’s settings. You can indicate how long you need to add for each recording.
- You can pick the recording quality depending on your equipment and capacity limit.
Troubleshooting Common Issues
Here are some steps and solutions to consider for each of these issues:
https://www.youtube.com/watch?v=YjF7YoQXYYg
Recording Failures:
- Ensure that your TV tuner or capture device is connected correctly and recognized by both Kodi and your operating system.
- Check out the manufacturer’s web page to see if there are any new updates you can download and install.
- Review and reconfigure your PVR add-on settings within Kodi.
Storage Issues:
- Consider deleting or moving older recorded content to free up space for new recordings.
- Adjust the recording quality settings in your PVR add-on to save space.
- If you have a network-attached storage (NAS), consider changing the recording storage location to one with more available space.
Quality Concerns:
- Adjust the recording settings within your PVR add-on.
- Ensure your TV tuner or capture device receives a strong and clear signal.
- Consider upgrading your TV tuner or capture device to one that supports higher resolutions and better signal processing.
Additional Resources
Here are some additional resources that can help you further explore and troubleshoot Kodi’s recording capabilities:
Forums and Communities:
- Kodi Community Forum: (https://forum.kodi.tv/)
- NextPVR Forum:(https://forums.nextpvr.com/)
Guides and Documentation:
- Official Kodi Documentation:(https://kodi.wiki/)
- NextPVR Wiki: (https://github.com/sub3/NextPVR/wiki)
FAQs
[sc_fs_multi_faq headline-0=”h3″ question-0=”What formats can I record video in when using Kodi?” answer-0=”The recording arrangement might differ depending on the extra you’re utilizing. By and large, famous organizations like MPEG-2 and H.264 are usually upheld. Check the documentation of the specific add-on for format details.” image-0=”” headline-1=”h3″ question-1=”How do I access my recorded videos in Kodi?” answer-1=”Recorded videos are typically saved in a specified directory on your system. Depending on your add-on, you can access them through the Kodi interface by navigating to the ‘Recordings’ or ‘PVR’ section.” image-1=”” headline-2=”h3″ question-2=”Can I record live TV kodi and watch other content simultaneously on Kodi?” answer-2=”This depends on your hardware and add-on capabilities. Some setups allow recording one channel while watching another but may require multiple TV tuners or specific add-on configurations.” image-2=”” headline-3=”h3″ question-3=”What should I do if my Kodi recording is failing or not working correctly?” answer-3=”Troubleshooting recording issues can be complex and may involve checking settings, add-on compatibility, and hardware configurations. Refer to the documentation of your chosen PVR add-on and seek help from Kodi forums or communities if needed.” image-3=”” count=”4″ html=”true” css_class=””]
Conclusion
In conclusion, recording live TV on Kodi is a valuable feature, and here we discussed how to record kodi video. NextPVR is a popular PVR software that can be used as a client within Kodi to enable TV recording and live TV functionality.
Recording on Kodi involves installing, configuring settings, enabling a PVR add-on, scheduling recordings, and managing recorded content. To ensure a smooth recording experience, keeping your Kodi software, PVR add-ons, and hardware drivers up to date is essential.
Recording kodi streams is a versatile feature that can transform your entertainment setup into a powerful media center. You can make the most of Kodi’s recording capabilities by following the tips and troubleshooting steps outlined in this conversation. Here is a guide on installing Covenant on Kodi.